What Causes Those Unsightly Drywall Dimples?
Drywall nail pops probably cause builders more wasted time on callbacks than any other problem. These insidious pitted places on formerly perfectly finished walls can be the bane of a builder’s existence.
The builder is trying to focus on his next project. Yet, callbacks from unhappy owners of his previous projects distract him from the project at hand. These former clients are grumbling about the unsightly bumps and blemishes appearing on their walls. Learn how to fix popped nails in drywall below.
What Are Nail Pops?
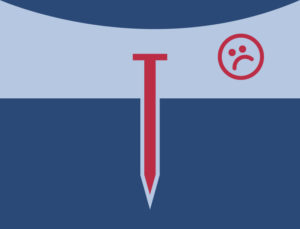
In sheetrock walls, nails heads sometimes “pop” through the surface, creating ugly bumps or cracks in the drywall finish. Nail pops look like wall sores.
What Causes Nail Pops?
Two things generally create nail pops: wood framing and improper wallboard installation.
Lumber alters shape as its moisture content varies. As moisture content fluctuates, all three axes of a wood stud— length, width, and depth— shrink and expand at different rates. Consequently, the studs in wood framing actually move and change shape.
Over time, the wood studs twist, warp, crack, or creep. The movement causes nails to back out of the wallboard and “pop” through the finish, cracking the wall’s textured coating and paint.
Other sources of nail pops include:
- Improper spacing of drywall screws or nails
- Installing the fasteners at an angle, rather than driving straight into the stud
- Missing the stud altogether with the drywall fastener
- Nails that are too short, resulting in insufficient penetration of the stud
- Overdriving the drywall screws or nails, breaking into the soft gypsum layer of the sheetrock
- Using too many— or too few— drywall connectors
- Foundation settling
How Do You Deal with Nail Pops?
There are two basic ways of fighting nail pops: treatment or prevention.
Treatment involves fixing the popped drywall nails as they appear. Here’s how:
- Generally, the drywall fastener needs to be hammered, screwed into place— or even removed, if it was overdriven. Driving in two nails or screws above and below the nail pop adds security.
- Smooth wallboard compound, commonly known as “mud,” over the patch. Be sure to add a good primer to the compound, or latex paint will not stick.
- After the mud dries, lightly sand the new patch.
- Apply a second light coat of wallboard compound. After it dries thoroughly, sand as before.
- Then, repaint the area.
Needless to say, avoiding nail pops by prevention is the easier course. Employing an experienced drywall contractor presents one option.
However, the best way to dodge nail pops and drywall cracks is to build with steel framing instead of wood.
How Steel Buildings Avoid Nail Pops
Commercial-grade, pre-engineered metal building systems eliminate nail pops in three ways.
First, prefabricated structures like RHINO’s steel buildings do not use nails. Everything in a steel building kit connects with bolts, nuts, or screws. Screws simply do not back out as easily as nails do.
Secondly, steel is an inorganic material. Steel does not absorb moisture, nor does it change shape with temperature variations. Steel buildings go up straight and true— and they stay that way for the lifetime of the structure.
Thirdly, steel’s high strength-to-weight ratio means a low-rise steel structure is actually lighter than a lumber-framed building.
Steel frames up at 25-foot intervals, instead of the 16-inch spacing of a typical wood building. Consequently, steel buildings place far less stress on the foundation, drastically reducing the chance of the structure settling.
Want to Know More About Prefab Metal Buildings?
Call RHINO Steel Building Systems today at 940.383.9566.

